How To Create a Liquidity Pool For Any Token On Tezos.
A step-by-step guide to create a liquidity pool, using QuipuSwap as an example.
5 minute read
In the world of decentralized finance (DeFi), liquidity pools play a critical role in facilitating decentralized trading. Following our previous tutorial on creating a custom token on Tezos, in this new tutorial I will walk you through the process of creating a liquidity pool on one of the Tezos decentralized exchanges.
Liquidity pools enable users to trade tokens in a decentralized and permissionless manner. They also allow users to provide liquidity to the pool and earn rewards for their contribution in the form of trading fees.
The process is pretty similar on most decentralized exchanges like Plenty.Network, SpicySwap, Quipuswap etc., so for this guide I will walk you through the steps of creating a liquidity pool using QuipuSwap as an example. Let’s start!
Step 1 - Go To Quipuswap And Connect Your Wallet #
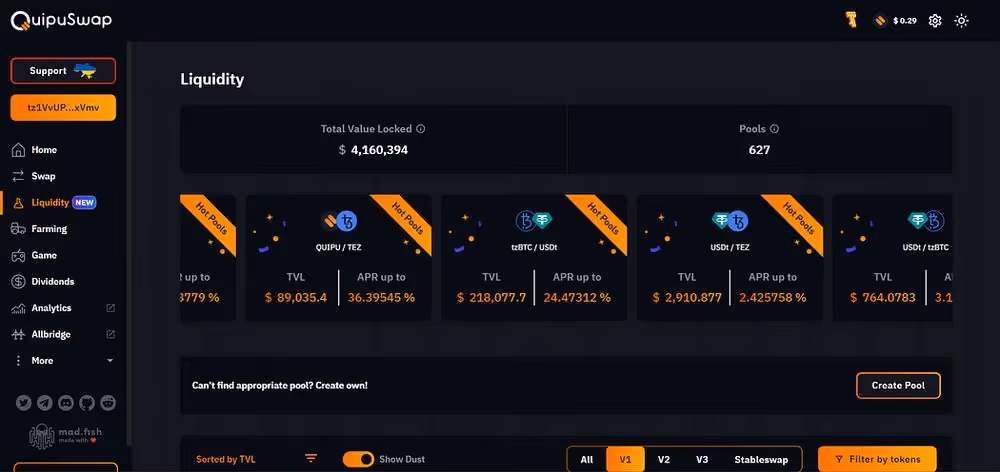
As always the first thing we will need is to have our Tezos wallet with the tokens we want to use ready. Then we go to the Quipuswap website (or Plenty.Network or Spicyswap based on your preference) and connect our wallet to the site.
Next, go to the “Liquidity” tab and click the “Create pool” button.
Step 2 - Choose The Type Of The Pool #
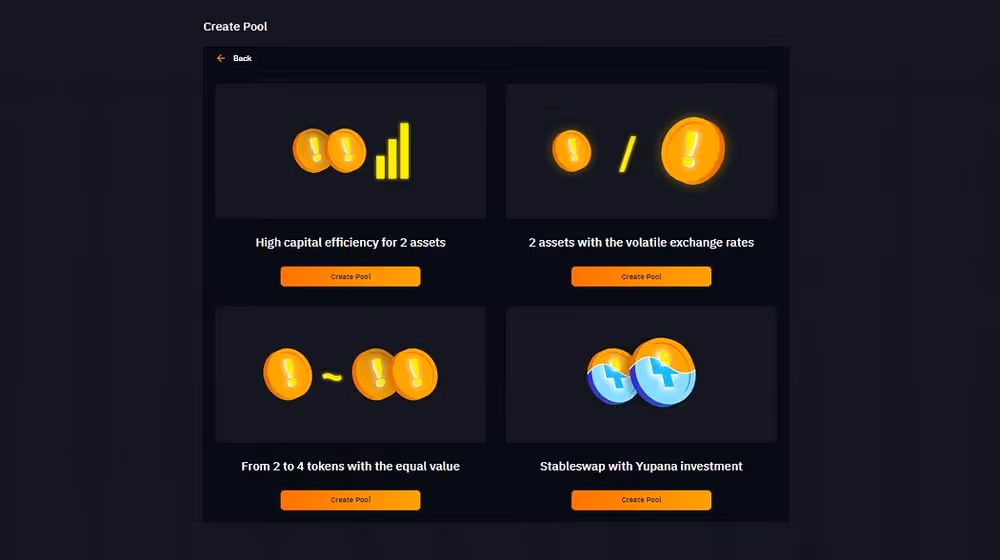
At this point we are asked to choose between the different types of liquidity pools that we can create. There are 3 main types that you will find which are:
- Normal AMM type pool for volatile assets (Volatile exchange rates)
These are the usual AMM pools that are used for pairs of volatile assets. - V3 type pool for volatile assets (High capital efficiency)
These are more complicated pools that are similar to Uniswap V3 pools and allow users to add liquidity in specific price ranges. If you are interested to learn more about V3 pools you can read the Madfish article about them. - Stableswap for stable assets
This type of pools use a different curve from the V2 pools with much lower slippage and are ideal for tokens of the same value like USD stablecoins (USDt/kUSD/uUSD/USDtz etc) and wrapped tokens of the same asset (tzBTC/uBTC, xtz/CTez etc).
For our purpose and to keep this tutorial simple, I will choose the normal AMM option for 2 assets with volatile exchange rates.
Step 3 - Select The Tokens And The Initial Liquidity That You Want To Add #
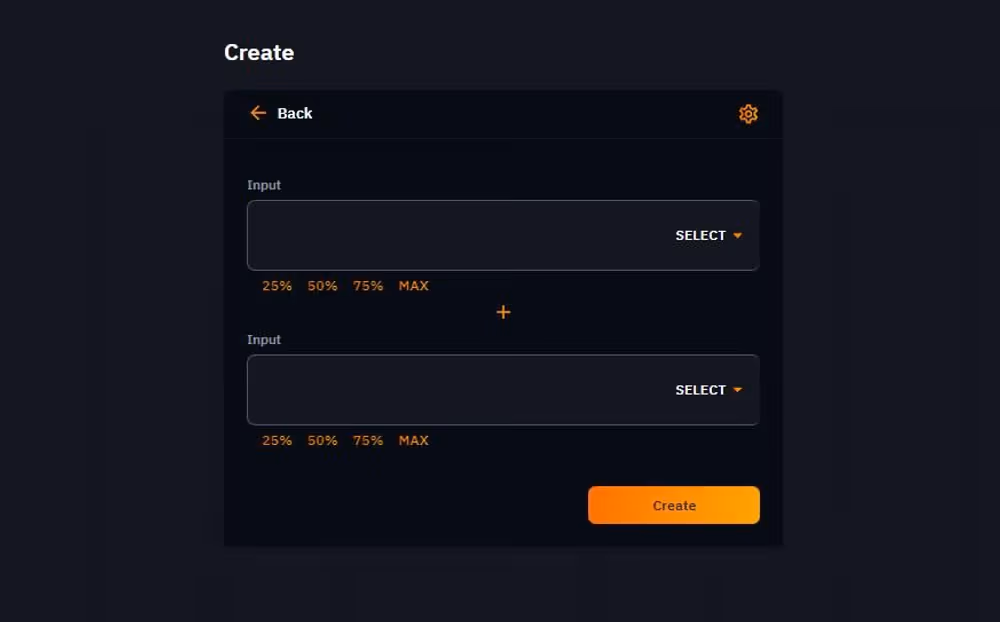
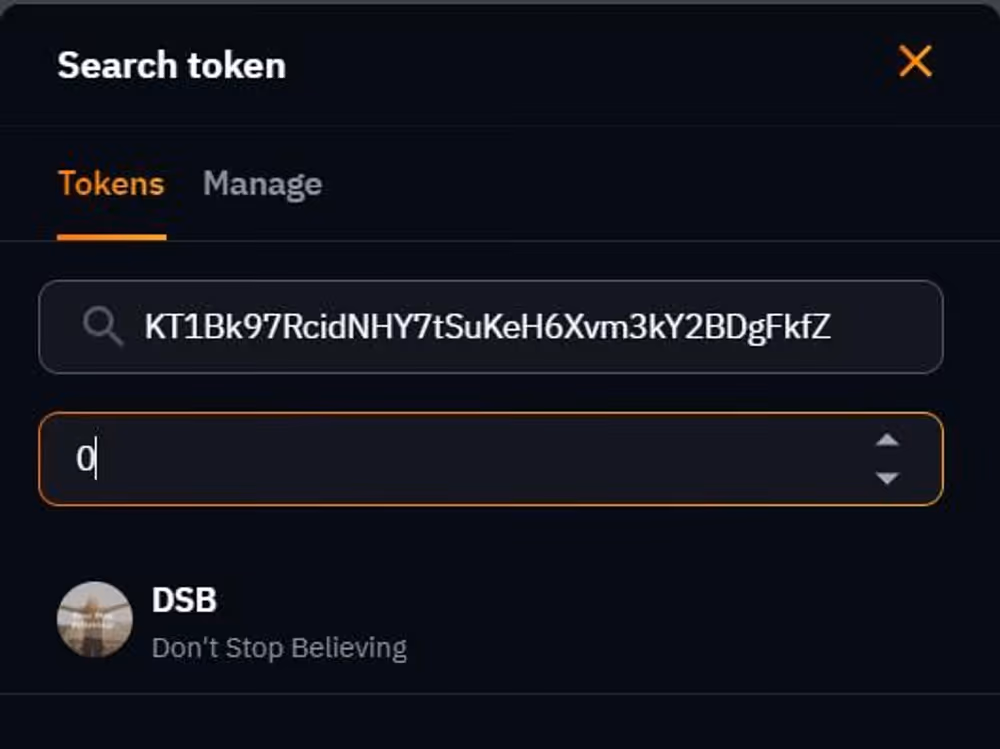
At this stage you have to choose the two tokens that you will use for the liquidity pool. For our example I will use DSB (the test token I created in our previous guide) paired with XTZ.
*Note that if you also want to use a token that is not in the drop down list (like the custom token we created), you can just paste the token contract address (you can find that in the “info” tab of the token inside your wallet) in the search bar and it will bring it up.
Once you select the tokens, you have to input the amount of each token that you want to use as initial liquidity for the pool. Keep in mind that the ratio of these amounts will also be the starting exchange rate (price) between these tokens.
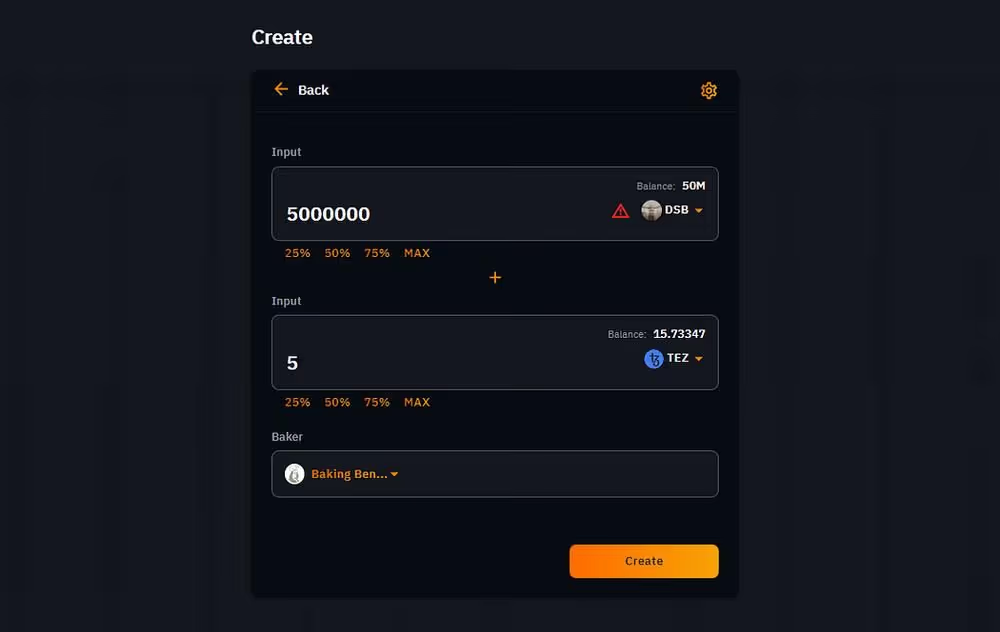
For our example I chose to put 5 million DSB tokens and 5 XTZ as initial liquidity, that means that the initial exchange rate for the tokens will be 1 XTZ = 1,000,000 DSB.
Lastly, if the liquidity pool you are creating includes XTZ as one of the assets, you will need to choose a baker (see image above) and you are ready to create your new liquidity pool!
Step 4 - Deploy! #
Double check everything, click the “Create” button, confirm the transaction and voila! Your liquidity pool has been deployed!
For creating this specific liquidity pool, the storage fees I needed to pay were about ~2.5 XTZ and in other cases it could be up to ~7 XTZ. These storage fees are paid only once during the creation of the pool and are required for deploying the liquidity pool’s smart contract on the blockchain.
With the “How To Easily Create a Token on Tezos” tutorial from last week and the tutorial we went through today, you are now able to create your own token on the Tezos blockchain and create a liquidity pool for your token with zero coding knowledge.