How To Easily Create a Token on Tezos
A step-by-step guide to create a token on Tezos without any coding skills.
Originally published at Tezos Commons News
850 words, 5 minute read
One of the features of Tezos is the ability to create custom tokens on its blockchain which can be used for a variety of purposes such as NFTs, Defi, loyalty programs, DAO governance ,or as we saw recently- just to create a meme token.
In this guide, I will walk you through the steps of creating a token on Tezos without the need for any coding skills. Whether you are a beginner or an experienced blockchain enthusiast, this guide will provide you with a comprehensive overview of the process and enable you to create your own custom token on the Tezos blockchain. So let’s get started!
Step 1 - Setup a Tezos Wallet #
First thing we will need is a Tezos wallet. If you already have a Tezos wallet set up, you can obviously skip this step, if not, you should go ahead and set up one of the many (awesome) Tezos wallets that exist. Here is a list with a few of the most popular ones.
TempleWallet***(browser extension & mobile app)
Kukai Wallet(web wallet usable on mobile too)
Umami(Desktop wallet)
Naan(Mobile wallet)
AirGap (Mobile wallet)
Step 2 - Go To The FA2 Bakery Website #
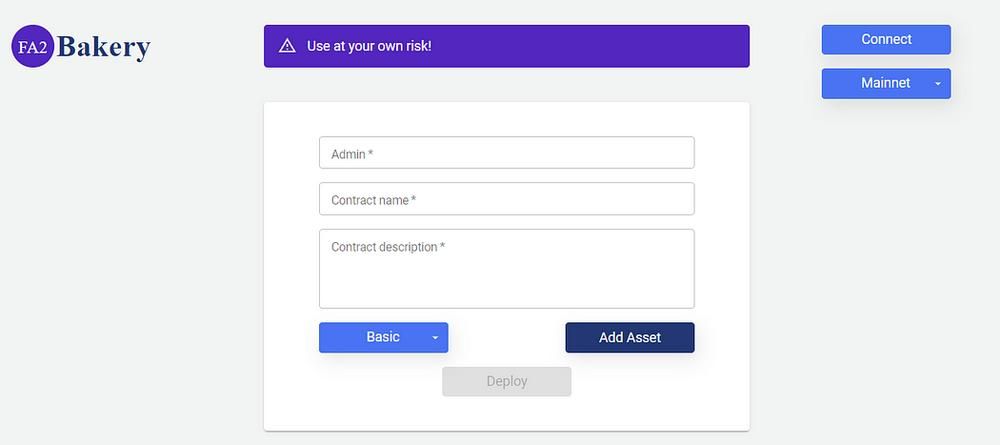
The “FA2 Bakery” is an open source tool created by Anastasiia Kondraurova from the Madfish.solutions team and it allows us to create tokens on Tezos in a simple way.
Once you have your wallet ready, go to the FA2 Bakery website and connect your wallet on the top right of the page and make sure that “mainnet” is selected right below the “connect” button.
Step 3 - Fill In The Details Asked #
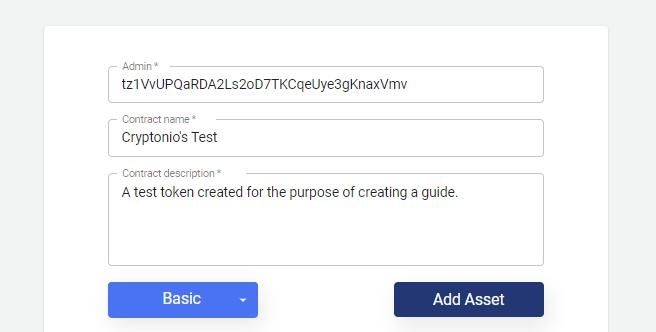
Now that our wallet is connected, we need to fill the details for our smart contract and our asset. Let’s look at all the details one by one:
Contract Details
- Admin
Here we need to set a Tezos address that will have admin rights of the token contract. The admin of the contract is able to pause transfers, create or burn tokens, and generally has power to alter the token contract in many ways. If we don’t want our contract to have any admin we can set it to a non existent address like for example tz1ZZZZZZZZZZZZZZZZZZZZZZZZZZZZNkiRg. - Contract name
Here we set a name for our contract, this will not be the name of our token. - Contract Description
In this field we can set a description for our contract, again this description won’t be visible in the wallets or in the token details, this is only visible in the contract.
Now that we have our contract details filled, we click on the “Add Asset” button and start filling the details for our token.
Token Details
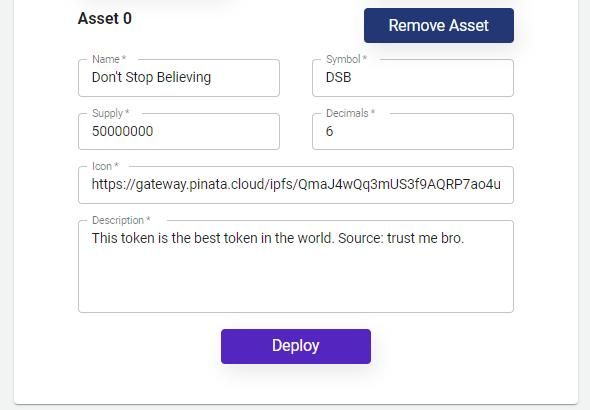
- Name
This field sets the name for our token, this is the name that will be seen in wallets and on DApps. - Symbol
Here we set the symbol we want to be used for our token. Like XTZ is used for Tezos and BTC is used for Bitcoin. - Supply
Set the number of tokens you want to create. In the example above I chose to create 50million DSB tokens which will be the supply of my token. - Decimals
The number of decimals determines the smallest quantity of our token that can be transacted. Like for example Bitcoin has 8 decimals and the smallest amount of bitcoin you can transact with is 0.00000001 BTC. In my example I have chosen my token to have 6 decimals. - Icon
This is were we choose the image for our token. We need to upload our image to an image storage site (or IPFS) and then post the link to the image in this field. - Description
Here is where you can set a description for your token!
Step 4 - Deploy! #
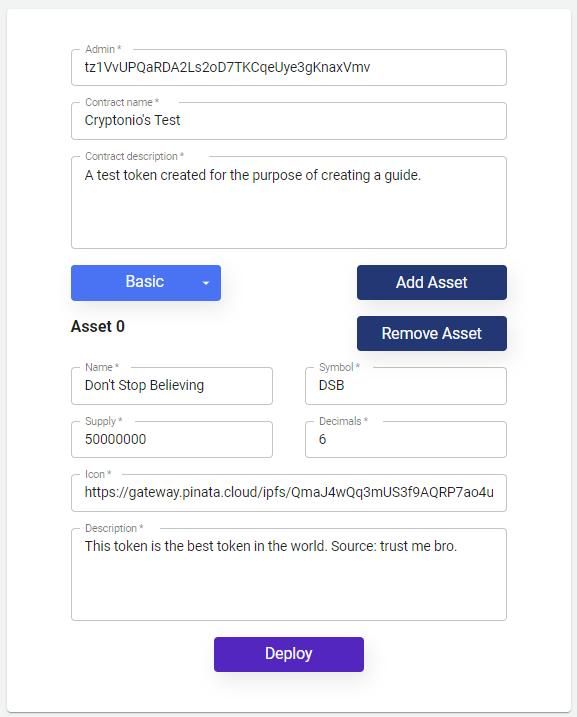
So now that we have all the details filled for the token contract and the asset itself, we are ready to deploy them! Note that the deployment of the token will cost some tez in storage fees and the amount depends on the detail selections we have made (supply, image, decimals etc). In my example, it cost me about ~1.40 tez in storage fees.
So click “Deploy”, confirm the transaction and boom! Our token is created and we should be able to see it in our wallet!
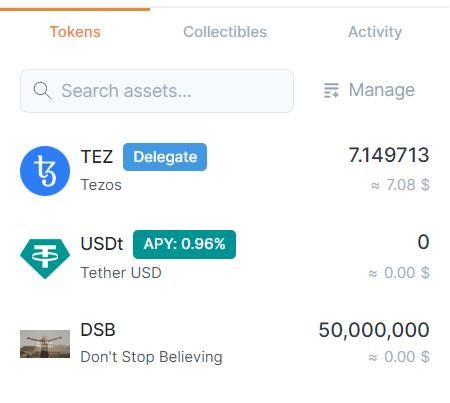
Now that your token is ready, you can go ahead and use it in any way you want. You can create a liquidity pool for your token on one of the Tezos decentralized exchanges, use your token for a royalty program you had in mind or even create a DAO with Homebase and use it as the governance token!