How To Easily Set Up a Tezos Multi-sig Wallet With TzSafe
A step-by-step guide for setting up a Tezos multisig wallet using TzSafe's easy interface (no coding required!)
7 minute read
Multisignature (“multi-sig”) wallets are a powerful tool for protecting your crypto assets. They allow multiple parties to have access to a single wallet, requiring a certain number of signatures to approve transactions. They differ from regular crypto wallets in that they require approval from multiple private keys before transactions can be executed. This makes them much more secure as it protects against individual key loss or theft risks associated with non multi-sig wallets. Multi-sig wallets are especially useful for organizations, businesses, project treasuries like DAOs, and other cases where multiple parties are involved in a pool of funds as they can be set up to require approval from multiple people before transactions are executed.
In addition to being useful for multiple-party wallets, multi-sig wallets can also be beneficial for individuals looking to secure their crypto assets. By requiring multiple signatures for transactions, multi-sig wallets reduce the risk of losing funds due to a single compromised private key.
If all that sounds like something you want to do then you’ve come to the right place because in this article we will go through the step-by-step process of setting up a multi-sig wallet on Tezos using Marigold’s TzSafe.
Setting Up Your Tezos Multi-sig #
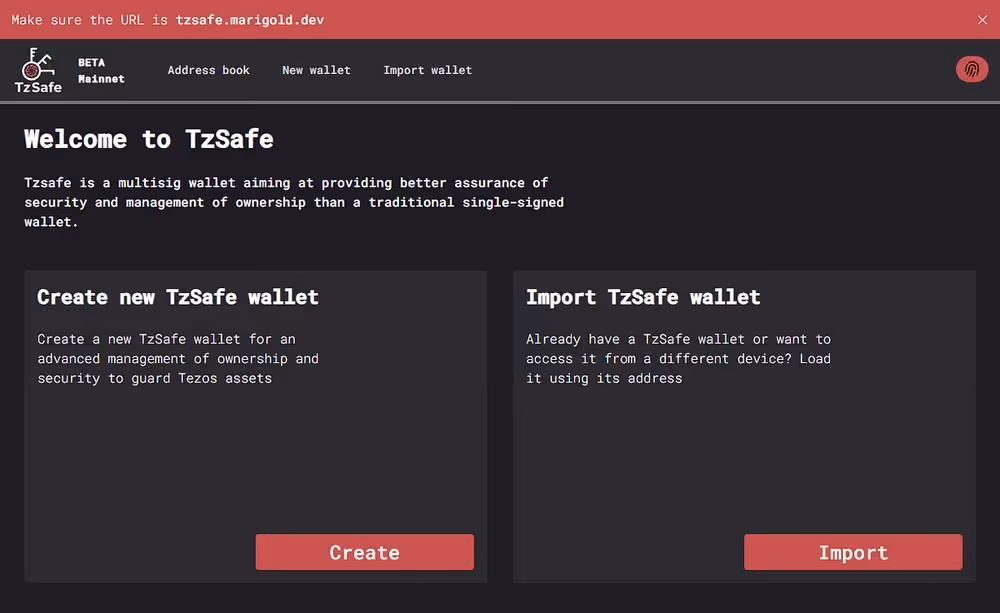
TzSafe is one of the great tools built by the amazing Marigold team and it allows you to set up a multi-sig wallet in basically 3 easy steps. So we start by going to the TzSafe website and connecting our wallets by clicking the “fingerprint” icon at the top right of the website, then clicking “Create”.
Step 1 - Name Your New Multi-Sig Wallet #
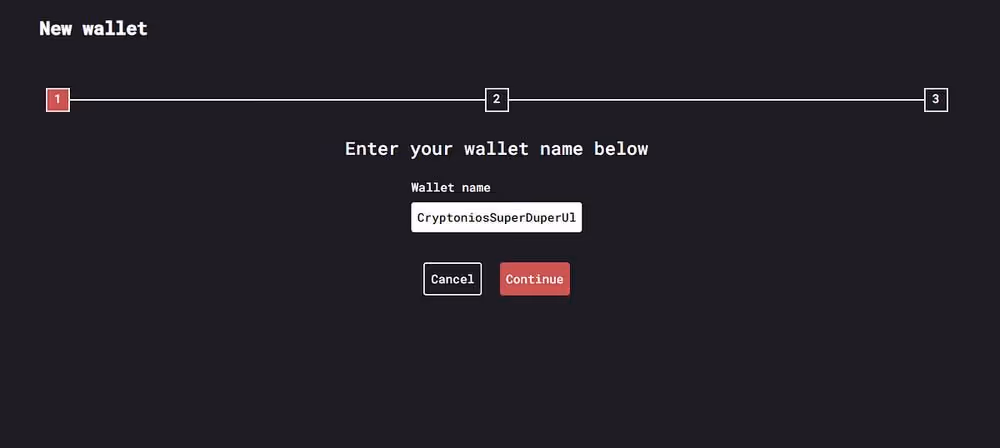
In this step, we just need to input a name for the new wallet we are creating. For this example, I will be using something simple and short, something like “CryptoniosSuperDuperUltraSafeWallet” (jokes aside, you can choose whichever name you want). Once you have chosen the name, click “Continue”.
Step 2 - Set Your Multi-Sig’s Preferences #
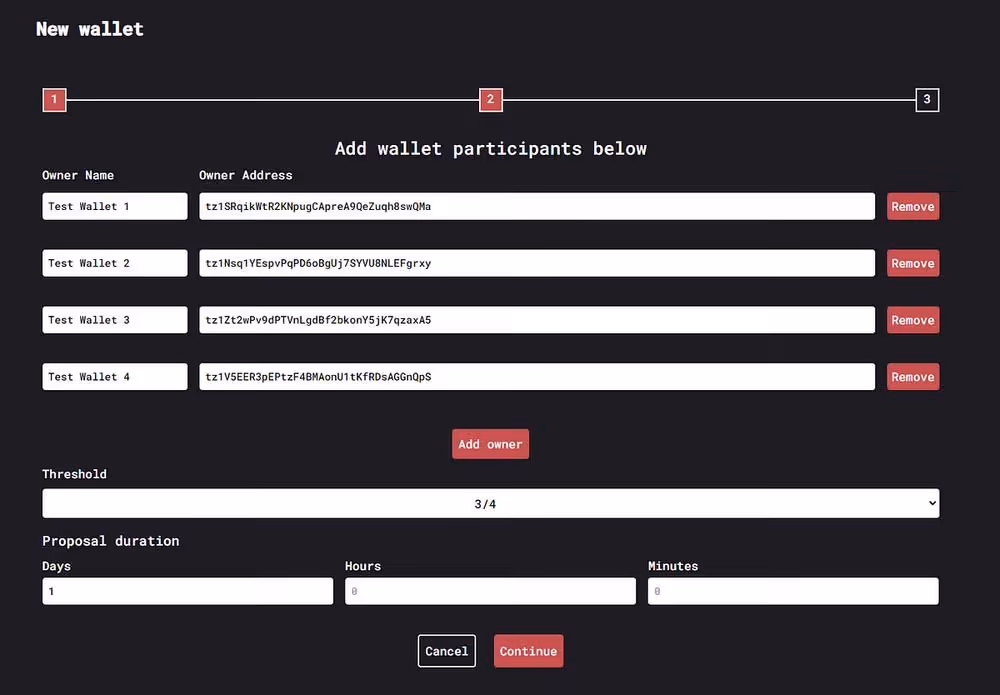
In this step, we will be setting the 3 main preferences for our multi-sig wallet.
The first one will be the number of participants [Note- you can add as many wallets (participants) as you want] to be part of this multi-sig, this can be done by clicking the “Add owner” or “Remove” button. For this example, I added four wallets.
The second preference we need to set is the “Threshold” which will set the number of signatures required for any action to be executed. For this example, I chose a “3 out of 4” setup. What this means in my example is that 3 of the participants that are listed will need to approve a transaction before the wallet executes the transaction. (Keep in mind that the more wallets you add in the first preference, the more options will show up in the “Threshold” drop-down menu.)
Lastly, we have to choose the "duration of the proposals". Every action wewill be doing with our multi-sig wallet will be in the form of a proposal from one of the wallets that the other wallets will need to sign (approve) or (reject). These proposals will be active for the time that we set in this preference. In this example, I will leave it set at 1 day. That means the participants will need to approve or reject the transaction within 1 day or else the transaction will automatically fail.
Note: These preferences can be changed after the wallet creation as well, but they will require all participants to sign the change so it’s better to set them at the start.
After filling in all of the details, we click “Continue”.
Step 3 - Our Multi-Sig Wallet Is Ready! #
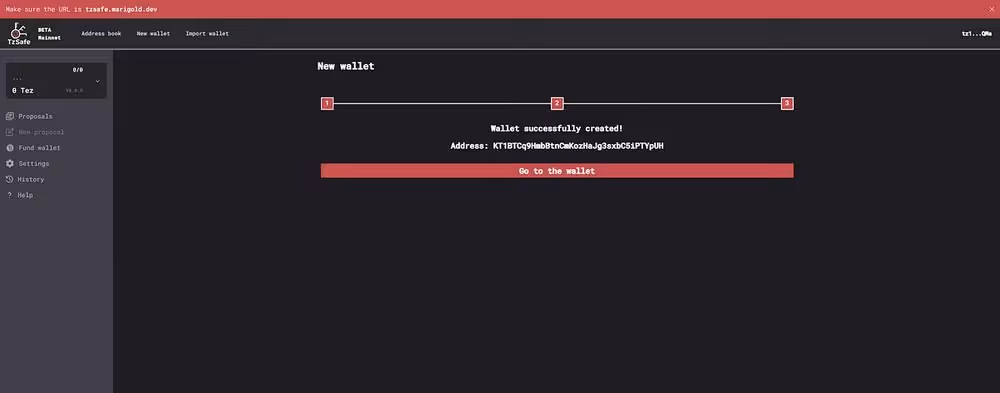
Congratulations! Our new multi-sig wallet is ready and at this step, we should be given the wallet’s address. Since multi-sig wallets are basically smart contracts, the address should start with “KT1…” and it should look like the screenshot above.
Make sure you save this address somewhere as you will need to import the wallet in the future if you log in from a different computer/browser etc. This is your multi-sig wallet’s public address (not a private key) so there is no fear of it being compromised or stolen.
Using Our New Multi-Sig Wallet #
Although the TzSafe UI is pretty self-explanatory, let’s take a quick look at some of the different things we can do with our newly-created multi-sig wallet.
Funding #
We can fund our wallet either through the “fund” tab or by directly sending funds to the public wallet address that we were given in the last step (KT1…). Just like with a normal wallet, we can use it to store and manage tez, tokens, and NFTs.
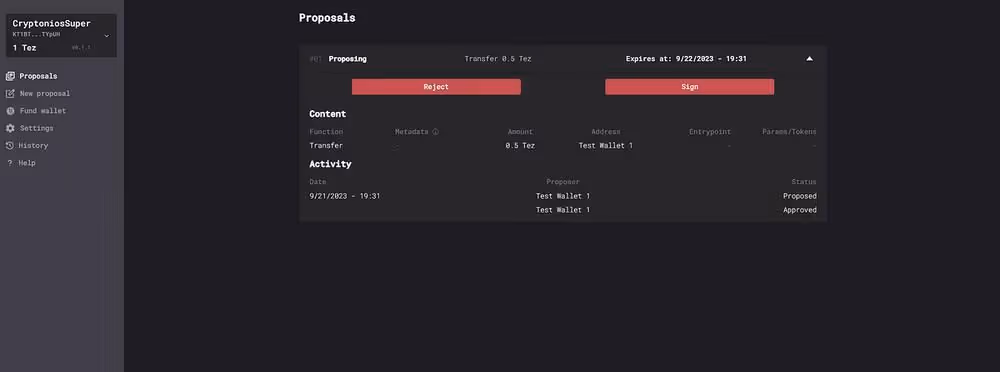
New proposals #
Here we can create proposals (as in wallet actions) for the other wallets to approve or reject. For example, you can create a proposal to send tez, FA1.2, and FA2 tokens to another wallet. Keep in mind that any of the participating wallets can create a new proposal and after creating one, they should show up in the “Proposals” tab.
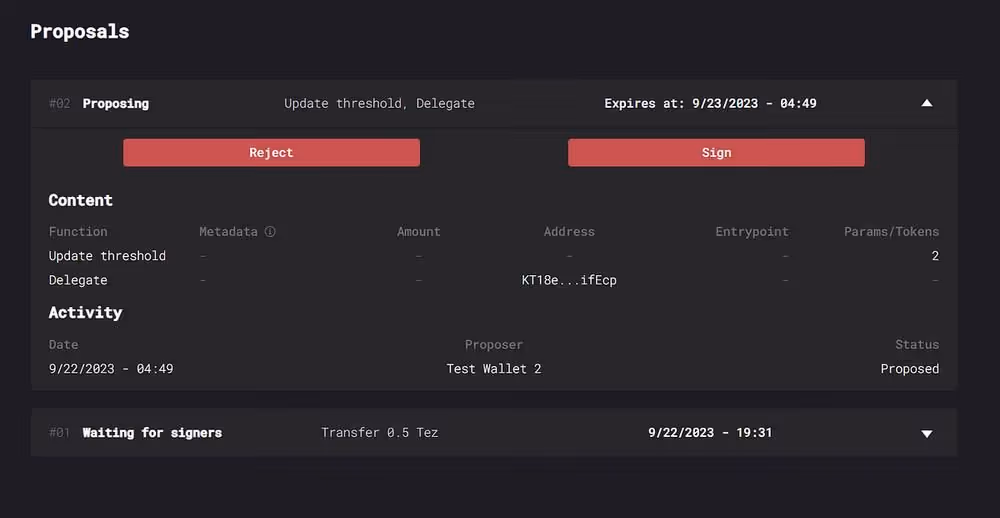
Settings #
In the “Settings” tab, we can edit our initial preferences (number of participants, threshold, proposal duration) and we can also delegate our tez to a baker (in case you are not familiar with Tezos staking, you can learn more about delegation in this article). Keep in mind that any change that we try to make in the settings tab (including delegation), will create a new proposal that the other wallets will need to sign as well.
There you have it! In just a few short paragraphs, we’ve covered the basics of setting up a Tezos multi-sig wallet with TzSafe. It really is that easy, so if you were looking for a way to set up a multi-sig wallet on Tezos, or if you just learned about it and would like to try it out, then go ahead and give TzSafe a shot!