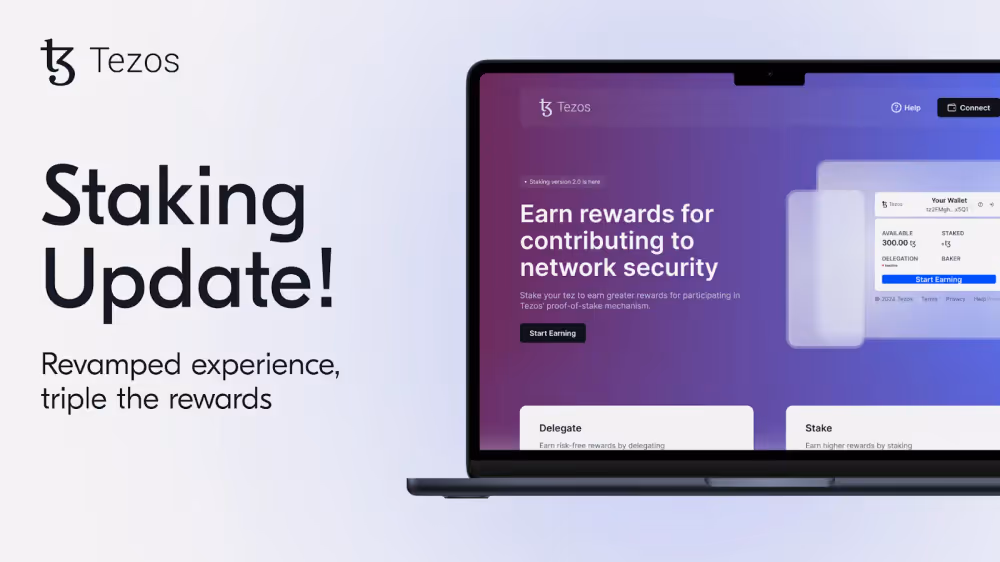
Staking update: Try the revamped dapp and earn 3x rewards
Learn how to stake your tez on the new stake.tezos.com with this step-by-step tutorial.
11 minute read
Note: Following the Rio and Seoul protocol upgrades, unstaking now finalizes automatically while cycles have been shortened to 1 day. For more information, please visit stake.tezos.com.
A lot has been happening on the staking front recently. Not only are staking rewards now three times delegation rewards following the Quebec protocol upgrade, but we’ve given the staking dapp a bit of a makeover to make the user experience more intuitive and seamless.
In this blog post, we’ll explain how you can stake your tez in just four easy steps using the revamped staking dapp, which you can find at stake.tezos.com. Along the way, we’ll also revisit key concepts such as bakers, delegation, and staking. Make sure to have your wallet ready with some tez in it so that you can follow along.
Let’s go!
Stake your tez in 4 steps #
Step 1: Connect your wallet #
Head over to stake.tezos.com, the staking dapp. Once there, you should be greeted by a landing page that explains delegation and staking, which are the two ways for you to earn on your tez. This tutorial covers staking, so we’ll be showing you how to do that.
First up, you need to connect your wallet. You can do so by clicking on either the “start earning” or “connect” buttons.
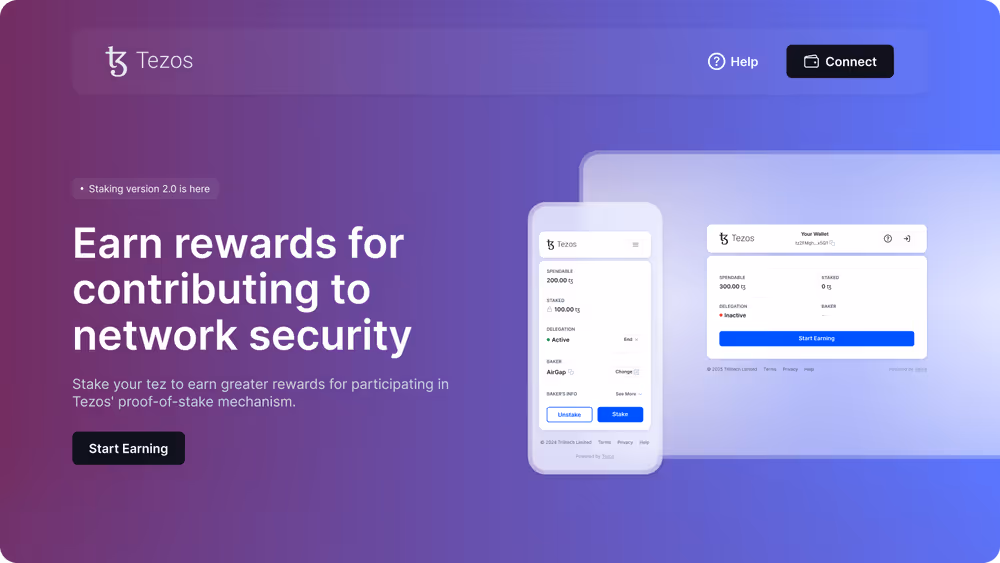
The stake.tezos.com landing page: Click on “start earning” or “connect” to get started.
Once you connect your wallet, you should see a dashboard view pop up. This is where you manage all of your delegation- and staking-related operations. If you aren’t delegating or staking yet, then you should essentially see a blank dashboard, similar to the image below.
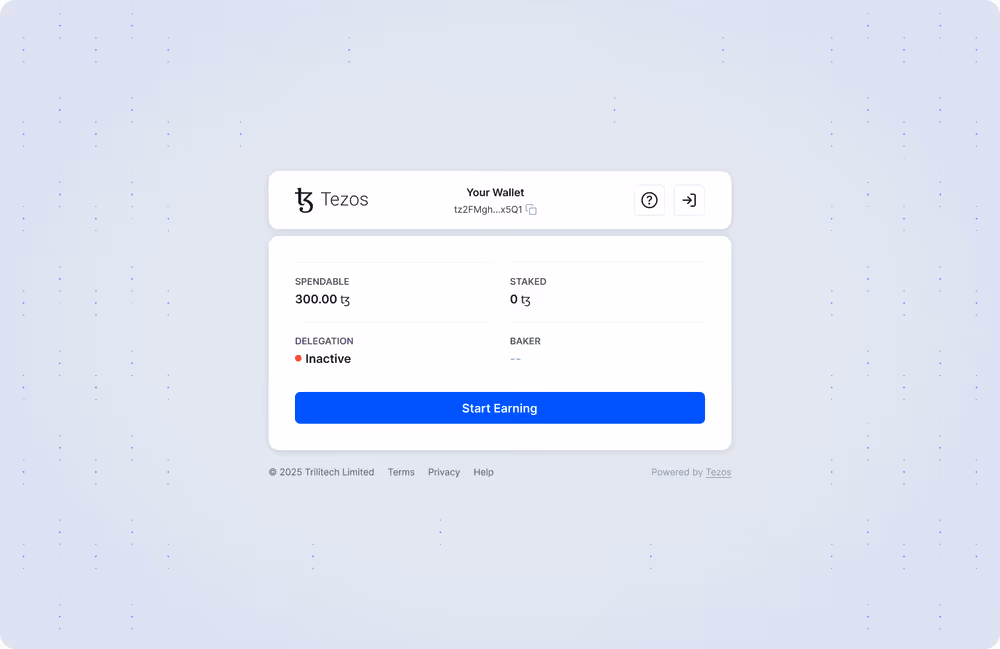
The stake.tezos.com dashboard: If you’re not delegating or staking, then you should see something similar to the above.
Step 2: Choose to delegate or stake #
To stake, click on the “start earning” button. Once you do so, you should be presented with two options: delegation or staking.
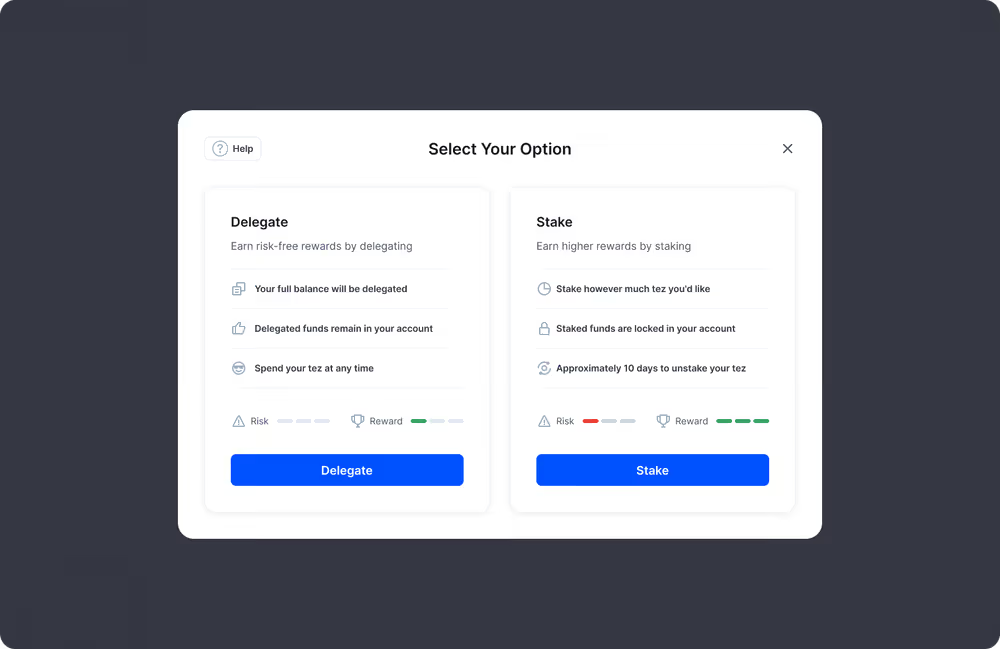
To earn, you can either choose to only delegate or delegate and stake.
For a quick refresh, delegation and staking are both ways for individual tez holders to participate in the Tezos network and earn rewards without having to run a node. However, there are some key differences.
Delegation: Your tez remains liquid, meaning you are able to move or spend them at any time (although this may impact your rewards). Delegation rewards, which are approximately one-third of staking rewards, are allocated by your baker, making baker selection extremely important.
Staking: Your tez is locked and exposed to slashing risks. Because staked funds are actually at stake, staking rewards are triple delegation rewards and accrue automatically. Note that you have to first delegate to be able to stake, so it’s not so much an either-or question as much as it is a question if you’d like to go the extra step to actually put your tez at stake.
Thanks to a recent update, the “stake” button now wraps up delegation and staking in one easy flow, so that you can complete all the necessary steps in one go. Click “stake” to continue.
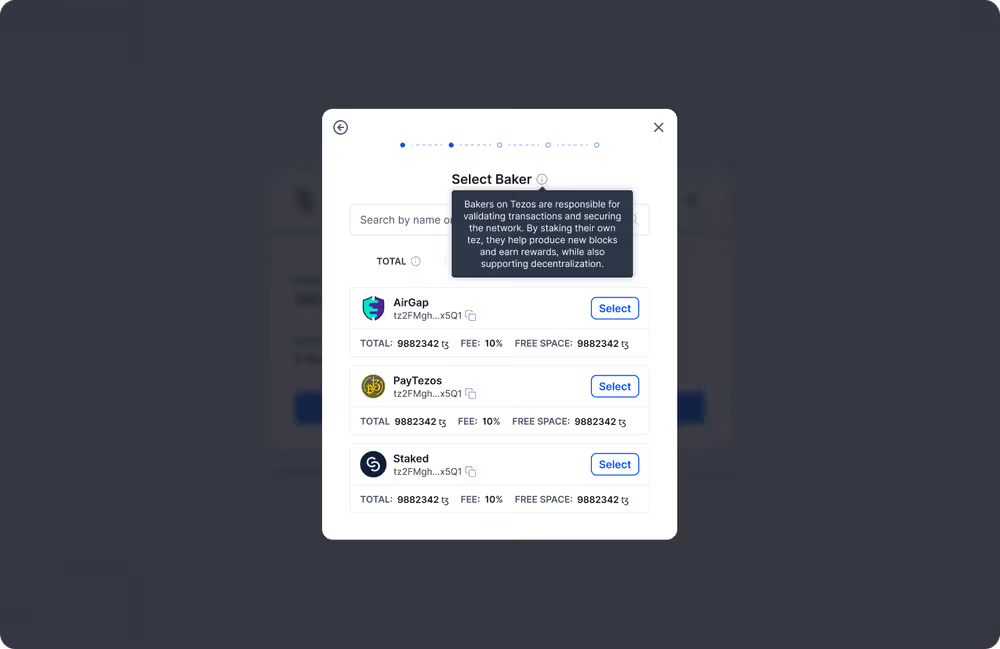
Step 3: Choose and delegate to a baker #
Once you click on the “stake” button, you should be prompted to select a baker, which is what validators are called in the Tezos ecosystem. They keep the blockchain running by confirming transactions and proposing blocks.

In order to stake, you need to first choose a baker and delegate your tez to them.
As we now know, you need to delegate your wallet’s balance to a baker first before staking with them. Click “select baker” to see a list of bakers, which you can adjust according to different criteria. When choosing a baker, consider their fees, reliability (uptime), and community reputation. You can find these stats on Tezos block explorers like tzkt.io or on dedicated sites like Baking Bad or Staking Assistant.
DYOR to ensure you choose a reputable baker; you can also change your baker at any time.
Once you have settled on a baker, go ahead and click the “select” button next to their name. Confirm their information on the following screen and hit “continue” to delegate to them.
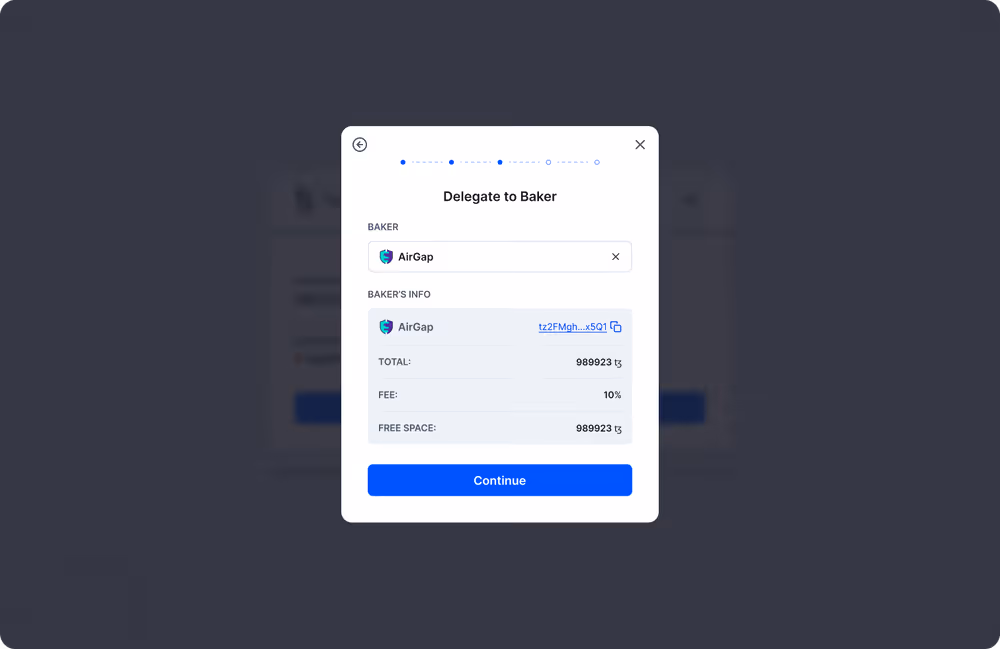
Confirm your delegation to your chosen baker; the delegation applies to your wallet’s entire balance.
Step 4: Stake with your baker #
Now that you have delegated to a baker, you can stake with them. After clicking on “continue” in the previous screen, you should be prompted to input the exact amount you’d like to stake. Input your desired number and hit “continue”. Be sure to leave a little tez left over in your wallet for fees!
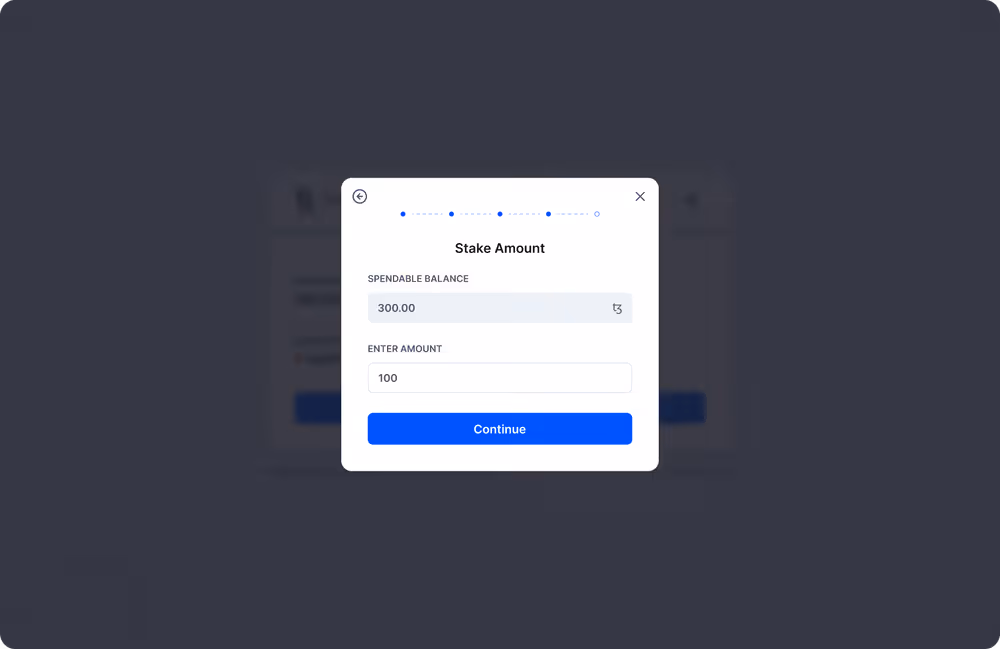
Unlike with delegation, you need to specify exactly how much you would like to stake.
Before you can stake, confirm that you have read the disclaimer on the following screen. It points out a few important things, including that unstaking takes approximately 10 days.

Make sure you read through the disclaimer before proceeding to the next step.
Click “stake” to finalize the staking process and – tada! You have now successfully staked your tez.
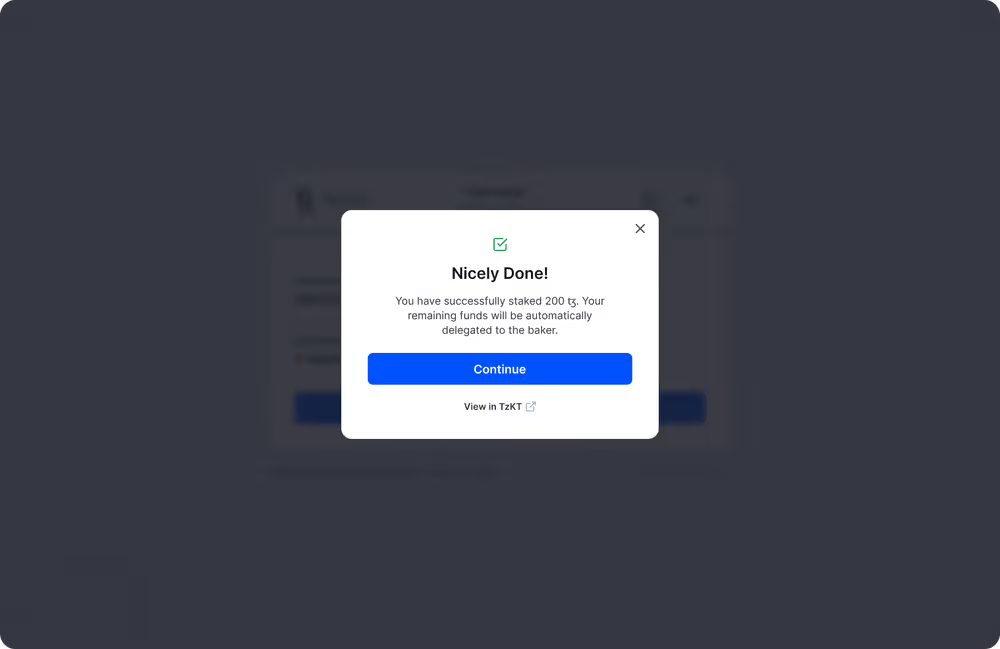
Once you’re done, you should see this confirmation screen.
Changing your baker, unstaking, and undelegating #
There might come a time when you would like to change your baker, unstake, or undelegate. Doing so is extremely easy and can be done at any time via your dashboard.
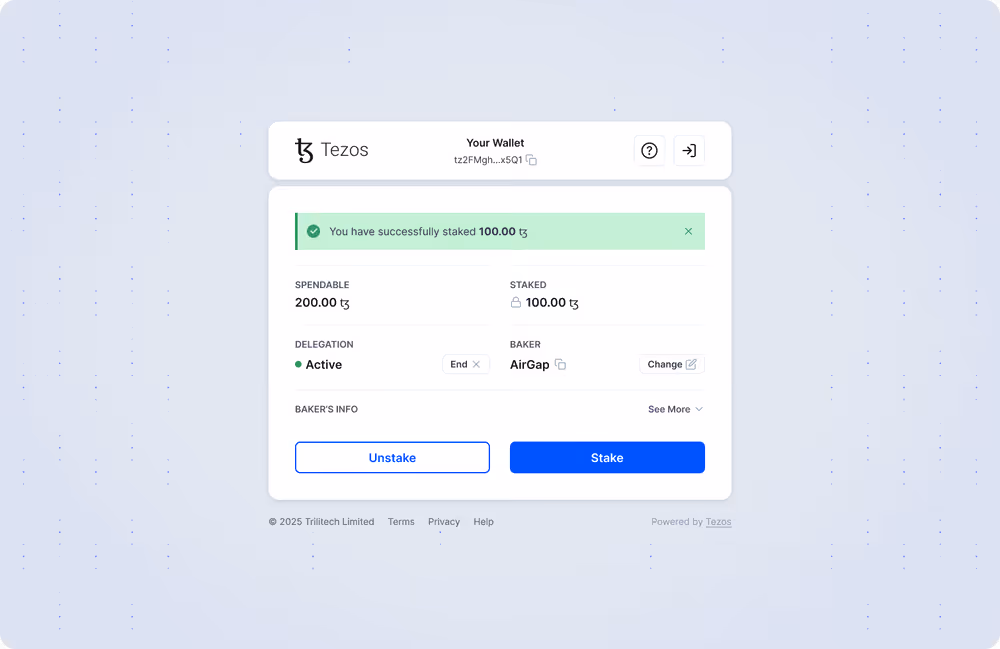
If you delegate and stake, your dashboard should look a little something like this.
Changing your baker #
You can change your baker at any time, but do know that changing your baker while you are actively staking with them will automatically unstake your entire staked balance. Because unstaking takes approximately 10 days and requires you to finalize the process, you’ll need to come back, finalize, and then stake with your new baker.
To change your baker, click the “change” button next to your baker’s name. You’ll see the same list of bakers again, and feel free to reorder the list with the toggles to explore your options.
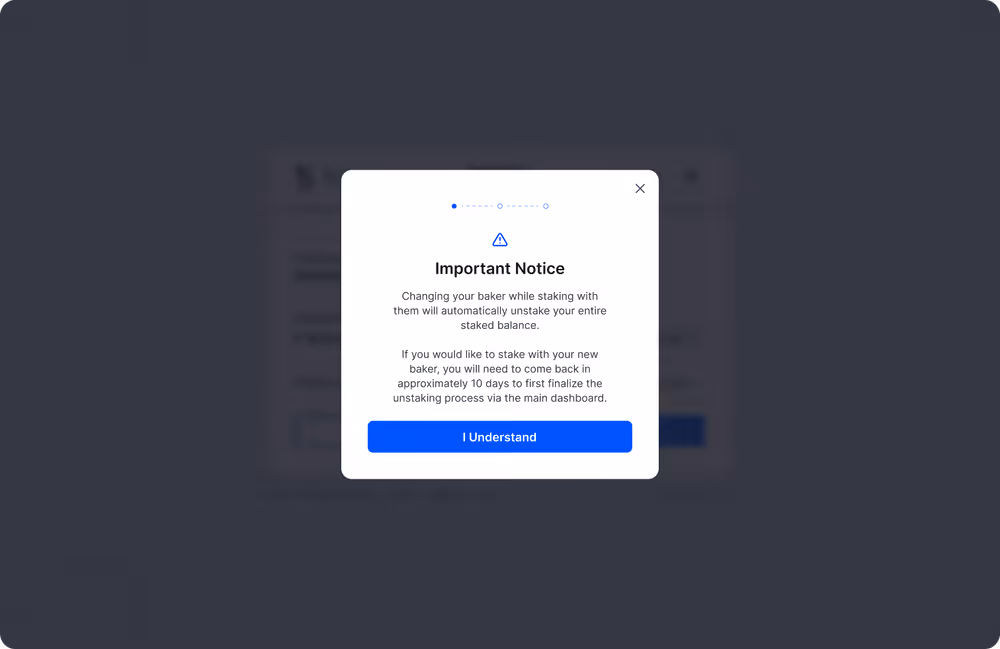
Before you choose your new baker, ensure you understand that this will automatically trigger an unstake request (should you be staking with your current baker).
Once you click “I understand”, you should see a familiar list of bakers. Choose a new baker and confirm your selection.
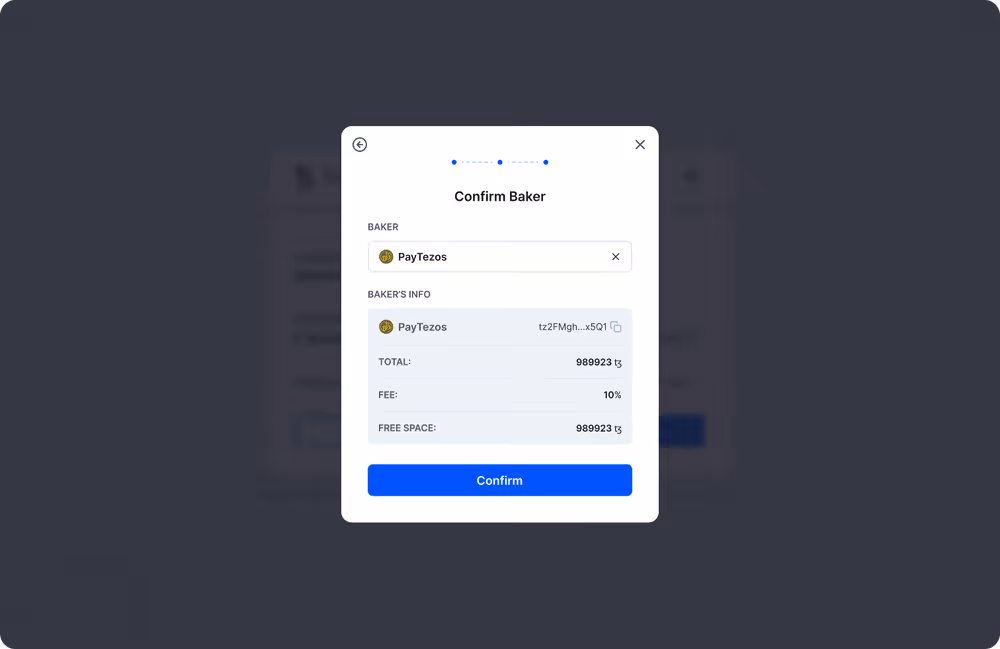
To change your baker, choose a new one from the list – as you did before.
Once your change baker request goes through, your staking rewards will halt immediately, while the unstaking process will commence and complete after approximately 10 days.
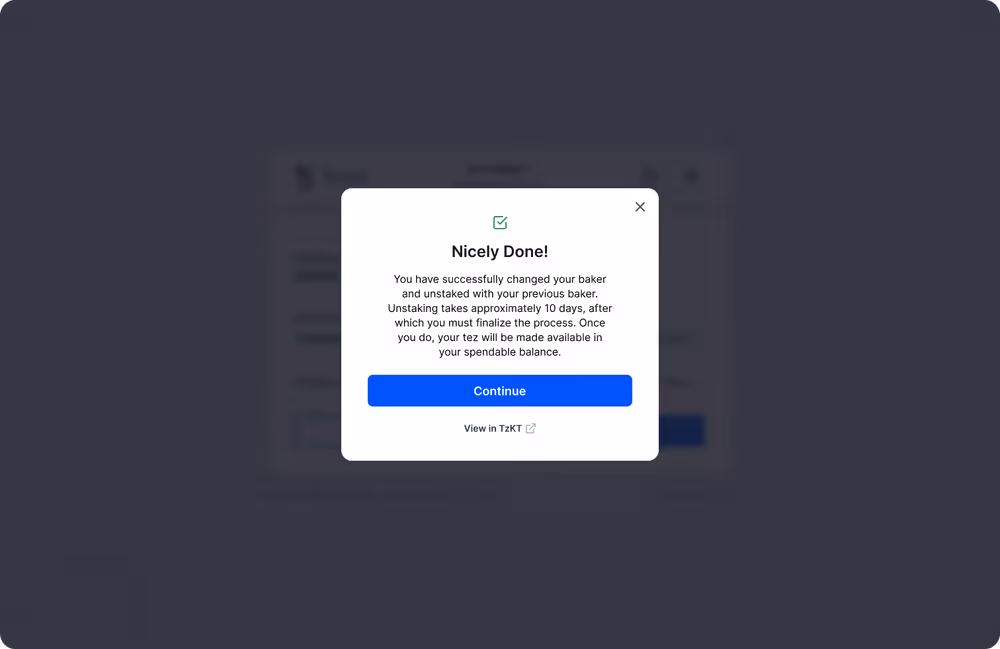
Your baker change request has gone through – nicely done!
If you return to your dashboard, you should see a small banner indicating that you have successfully changed your baker. At the bottom, you should also see a pending unstake request, as well as the cycle in which it will be finalized.
Side note: If you’re not aware of what a cycle is, it’s a unit of time used in the Tezos network that currently equates to about 2.5 days. So, come back in four cycles (approximately 10 days) to finalize the unstaking process.

Your baker change went through! If the change triggered an unstake request, come back in 10 days to finalize the process.
Ten days have now elapsed; on your dashboard, you should now see a new “finalize” button that has popped up at the bottom. Once you click this button, you’ll complete the unstaking process, making your tez available once again.

To finalize the unstaking process, simply click on “finalize”; this will make your tez available once again.
Unstaking #
You can also unstake without changing your baker. Go to your dashboard, where you should see two primary buttons – “stake” and “unstake”. Hit “unstake” to start the process and specify the amount you’d like to unstake.
Again, important notice! You already know from the staking screen that unstaking takes approximately 10 days. In order to complete your unstaking process, you will need to come back to your dashboard in 10 days to manually finalize it.
You can also unstake a certain amount if you so choose. Input your desired amount and click “confirm”.

You can choose to unstake some tez or your entire staked balance.
Once your request goes through, you should see the following confirmation screen. Remember that unstaking is a two-step process; you’ll need to come back in approximately 10 days to finalize it.
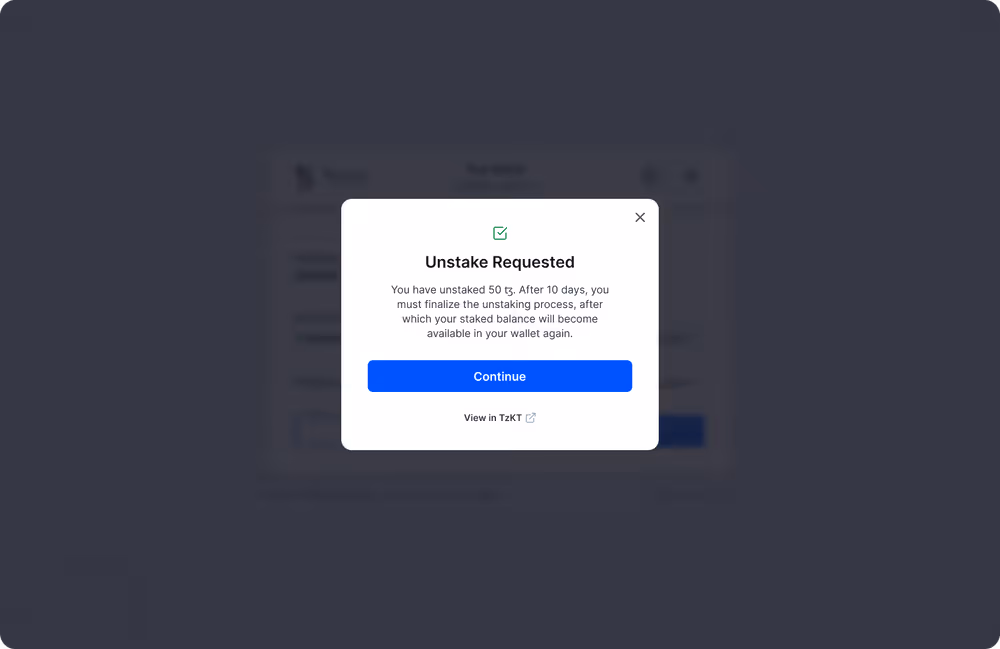
Unstaking takes 10 days, so make sure to come back and finalize the process.
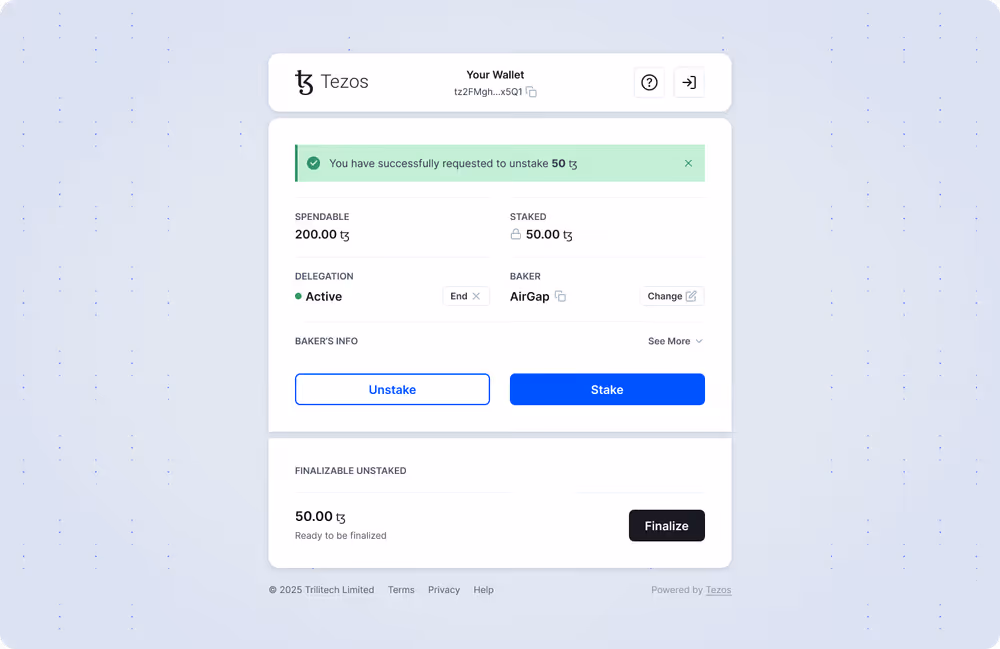
Thankfully, you can see on your dashboard the cycle in which you requested to unstake and the cycle in which it will be finalizable.
Side note: If you’re not aware of what a cycle is, it’s a unit of time used in the Tezos network that currently equates to about 2.5 days. So, come back in four cycles (approximately 10 days) to finalize the unstaking process.

You can check your dashboard view to see your unstake request as well as when it will be finalizable.
Ten days have now elapsed; on your dashboard, you should now see a new “finalize” button that has popped up at the bottom. Once you click this button, you’ll complete the unstaking process, making your tez available once again.
Once you click “finalize”, your tez will be made available again. Unstaking complete!
Undelegating #
Undelegating is extremely straightforward, but it will trigger an automatic unstake request if you currently stake with a baker.
To undelegate, go to your dashboard and look for the “end” button next to the name of your baker. Click it and confirm that you indeed want to end your delegation.

Confirm that you want to end your delegation to undelegate.
And that’s it! If you happened to be staking as well, check out the “unstaking” section to learn how to finalize your unstake request. Note that delegating will automatically unstake your entire staked balance, which you can track via your dashboard.
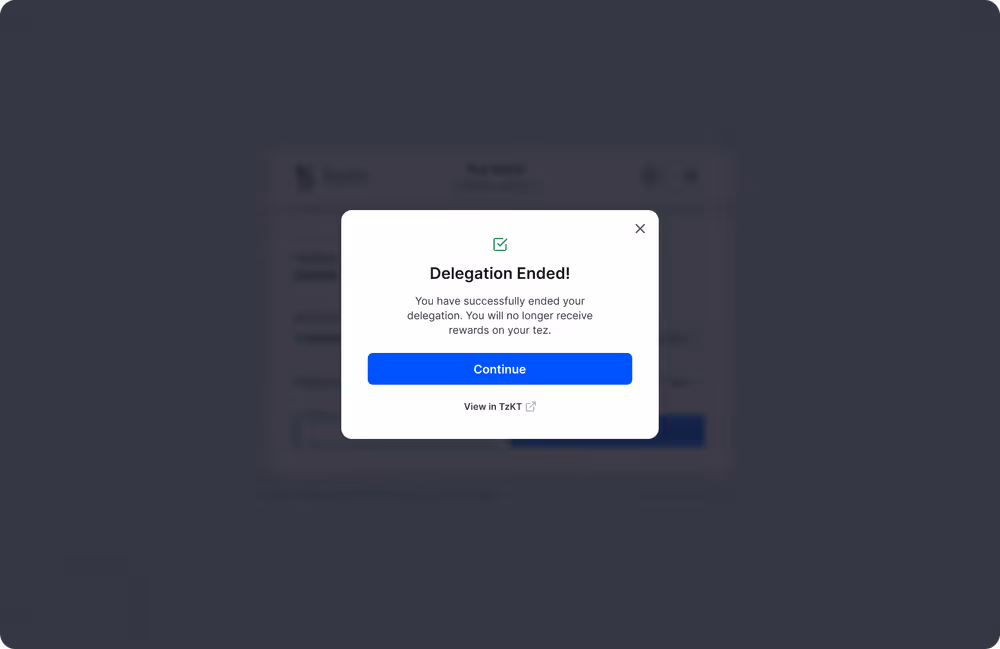
Once you end your delegation, you’ll no longer received rewards on your tez.
Further reading #
We just went through the basics of staking via the staking dapp, but there’s a lot more to get into. If you’d like a more in-depth read on how staking works in the Tezos ecosystem, check out the following:
Happy staking!